
Create a Video Campaign
Login to your Advertising account.
From the navigation menu at the top, go to “Advertisers” and then select “New Campaign” from the drop down menu.
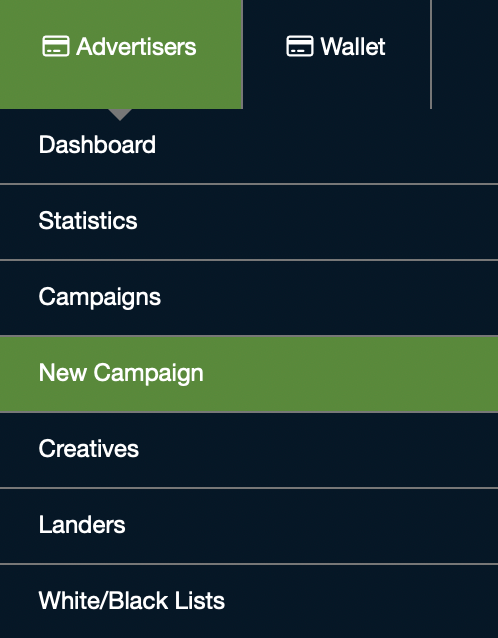
Alternatively, select “Campaigns” from that same drop down menu to view and manage the campaigns linked to your account. Then, select “New Campaign” from the top right of the Campaigns page.
Ensure you have sufficient funds in your wallet.
Campaign Type
Create an “Ad / Traffic” or “Creator” campaign. Your selection will be highlighted in blue.
For a Creator campaign setup, please click here.
Select “Ad / Traffic” campaign.
Click the blue “Continue” button at the bottom right once you have chosen your campaign type.
Type
In New Campaign
Select your Ad Type: “Display” or “Video”. Your selection will be highlighted in blue.
For a Display ad campaign, please click here.
Select “Next” at the bottom right once you have chosen your appropriate campaign type.
This will bring you to Settings as indicated by the progression bar at the top.
Settings
In Settings, you can:
• Name and Label your campaign
• set your Bidding specifications
• optimize outreach with Targeting by region, language, operating system, or device
• set specific times in Scheduling to run your campaign
General
Name
Name your ad campaign to easily identify it.
Labels
Optionally add Labels to your ad campaign.
Labels are for your organizational benefit. They will be displayed internally next to the campaign’s name on the Campaigns Page. You can sort/group campaigns by your Label(s).
Bidding
Each time a visitor loads a webpage with ad spaces, an auction determines which ads will appear in these given ad spaces. Your bid specifications determine your power in this ad auction.
Ad Type
Select the ad format for this campaign (you can assign only one). Creatives must adhere to the selected size. This cannot be changed later.
• The Ad Type size and estimated daily impressions for that corresponding size are displayed.
Before confirming the Ad Type, you may want to review which sites (or Publishers) that specific Ad Type has inventory from. This information is displayed directly under the selected Ad Type.
*Publsihers are subject to change
By default, your campaign will bid on traffic from all available sites per Ad Type. To narrow your campaign’s bidding options, please create and apply a white/black list to your campaign.
CPM
The cost per ($USD) 1,000 impressions.
• Set the campaign CPM by either using the arrows to change by a whole digit or by typing in a number which can include decimals.
Daily Budget
How much of a daily allowance will this campaign have?
• This is the maximum daily spend ($USD) your campaign may achieve.
• Once the Daily Budget is reached, the campaign will be paused for the remainder of the day.
If a campaign reaches its Daily Budget it will be paused and resume the following day at 00:00 UTC or when its Scheduling begins next.
(Provided the Total Spend Limit has not been reached and there are funds in your wallet)Spread Daily Budget
Spread Daily Budget
When enabled, your Daily Budget amount will be evenly allocated throughout the remaining hours of the day. This spread is adjusted on an hourly basis and will reset at 0:00 UTC.
This feature is not typically recommended for lower-budget campaigns as spend may be skewed to later hours of the day.
Total Spend Limit
Optionally set a total campaign spend limit.
• Enabled: set a maximum lifetime spend limit; upon hitting this number, the campaign will end.
• Disabled: campaign will run until there are no funds, it is outbid, or it is otherwise paused.
When a campaign reaches its Total Spend Limit, it cannot be un-paused. The Total Spend Limit must be raised in order for it to run again.
Bid Type
Set the bidding method for this campaign.
• Flat Bidding: Your predetermined CPM will be used to bid for the ad space.
• Smart Bidding: Set the max spend CPM and our system will provide you the best value amongst competing offers - fluctuating the CPM lower when possible.
Smart Bidding - setting a CPM disproportionately high will not provide you with the best value.
Frequency Capping
Limit the number of views per unique visitor in a given time period.
EXAMPLE: “2 views per user in 24 hours” ensures that a unique visitor will only see your ad campaign a maximum of 2 times within a 24 hour window.
Targeting
Targeting is optional and will expose your ad campaign to a more specific audience.
Each targeting field must be individually enabled.
White/Black List
Pre-filter the sources of your campaign by applying an existing white/black list to it.
• Only previously created white/black lists can be applied.
• You can apply a list after the campaign is created by editing your campaign.
Connection
Selection is highlighted blue.
• All — incorporate all visitors regardless of their Connection type
• Wi-Fi — ad campaign is shown to those visiting the webpage via Wi-Fi connection
• Carrier — ad campaign is shown to those visiting via cellular networks
Keywords
Your ad campaign will display only (whitelist) OR not at all (blacklist) on webpages containing these keywords.
• Keywords are delimited by a new line.
• White/Blacklist creation is indicated by a blue highlight over which is being edited.
It is recommended to include as many single-worded keywords as possible and to include alternate spellings (keywords are case-sensitive).
Please note: not all sites accept keyword targeting. Please reach out to our Help Desk support team with any specific questions about Keyword Targeting.
Channels
Channel targeting allows you to target ad space on a specific creator channel(s). Targeting a channel limits your campaign’s bidding pool to the selected channel(s).
• In the search bar, type in the creator(s) you want your campaign to actively bid for ad space on.
• Interested in this feature? Reach out to our Help Desk for more information!
Targeting a channel does not guarantee your ads will be displayed there. Your campaign is ONLY bidding for traffic on these selected channels and will still have to outbid other campaigns.
Countries
Target only or all except these countries (list option is highlighted in blue). Selection(s) appear in the right-hand column.
• In the left column, search or scroll for the Country you want to add to the list. Select the country to add it to the list in the right-hand column.
• To remove a country selection, select it from the right-hand column.
Regions
Target Regions/States/Providences within a country. Target only or all except these regions (list option is highlighted in blue). Selection(s) appear in the right-hand column. Must have at least 1 Country targeted.
• In the left column, search for a Region you wish to target.
• To remove a selection, click on the region from the right-hand column.
Congressional Districts
Target Congressional Districts within a Region (USA only). Target only or all except.
Interested in this feature? Reach out to our Help Desk for more information!
Cities
Target Cities/Districts within a Region. Target only or all except these cities (list option is highlighted in blue). Selection(s) appear in the right-hand column. Must have Regions Targeting enabled.
• In the left column, search for a City you wish to target.
• To remove a selection, click on the city from the right-hand column.
Zip Codes
Target specific Zip Codes within the USA.
• Select the State in which the Zip Code exists.
• In the left column, search or scroll for the Zip Code you wish to target. Select it from the left column.
• To remove a selection, select it from the right-hand column.
Carriers
Available internet Carriers appear in the left column. Target only or all except these carriers (list option is highlighted in blue). Selected carriers appear in the right-hand column. Must have at least 1 Country targeted.
• In the left column, search for a Carrier you wish to target.
• To remove a selection, click on the Carrier from the right-hand column.
Language
Target only or all except these languages (list option is highlighted in blue). Selection(s) appear in the right-hand column.
• Search a Language(s) you want your ad campaign to target.
• To remove a selection, click on the language from the right-hand column.
Operating Systems
Target only or all except the OS (list option is highlighted in blue). Selection(s) appear in the right-hand column.
• Search for which Operating System(s) you want your ad campaign to target in left column.
• Select a whole section by selecting the title (e.g. selecting “Desktop” selects all desktop operating systems).
Devices
Target only or all except the device(s) (list option is highlighted in blue). Selection(s) appear in the right-hand column.
• Search for which Device(s) you want your ad campaign to target in left column.
• To select a whole section, select its title (e.g. selecting “Mobile” selects all mobile devices).
Pay attention to any white/blacklisted zones. Check the zone’s title and description because some zones might consist of desktop/mobile traffic.
Scheduling
Campaign Scheduling will limit the hours and days which your campaign will receive traffic.
Times displayed are localized times based on the visitor’s location.
%20copy.png?inst-v=5188b1c1-ff34-4287-8471-3bb4f7643fc9)
.png?inst-v=5188b1c1-ff34-4287-8471-3bb4f7643fc9)
Creatives
The third step is adding (video) Creatives to be displayed in your ad campaign.
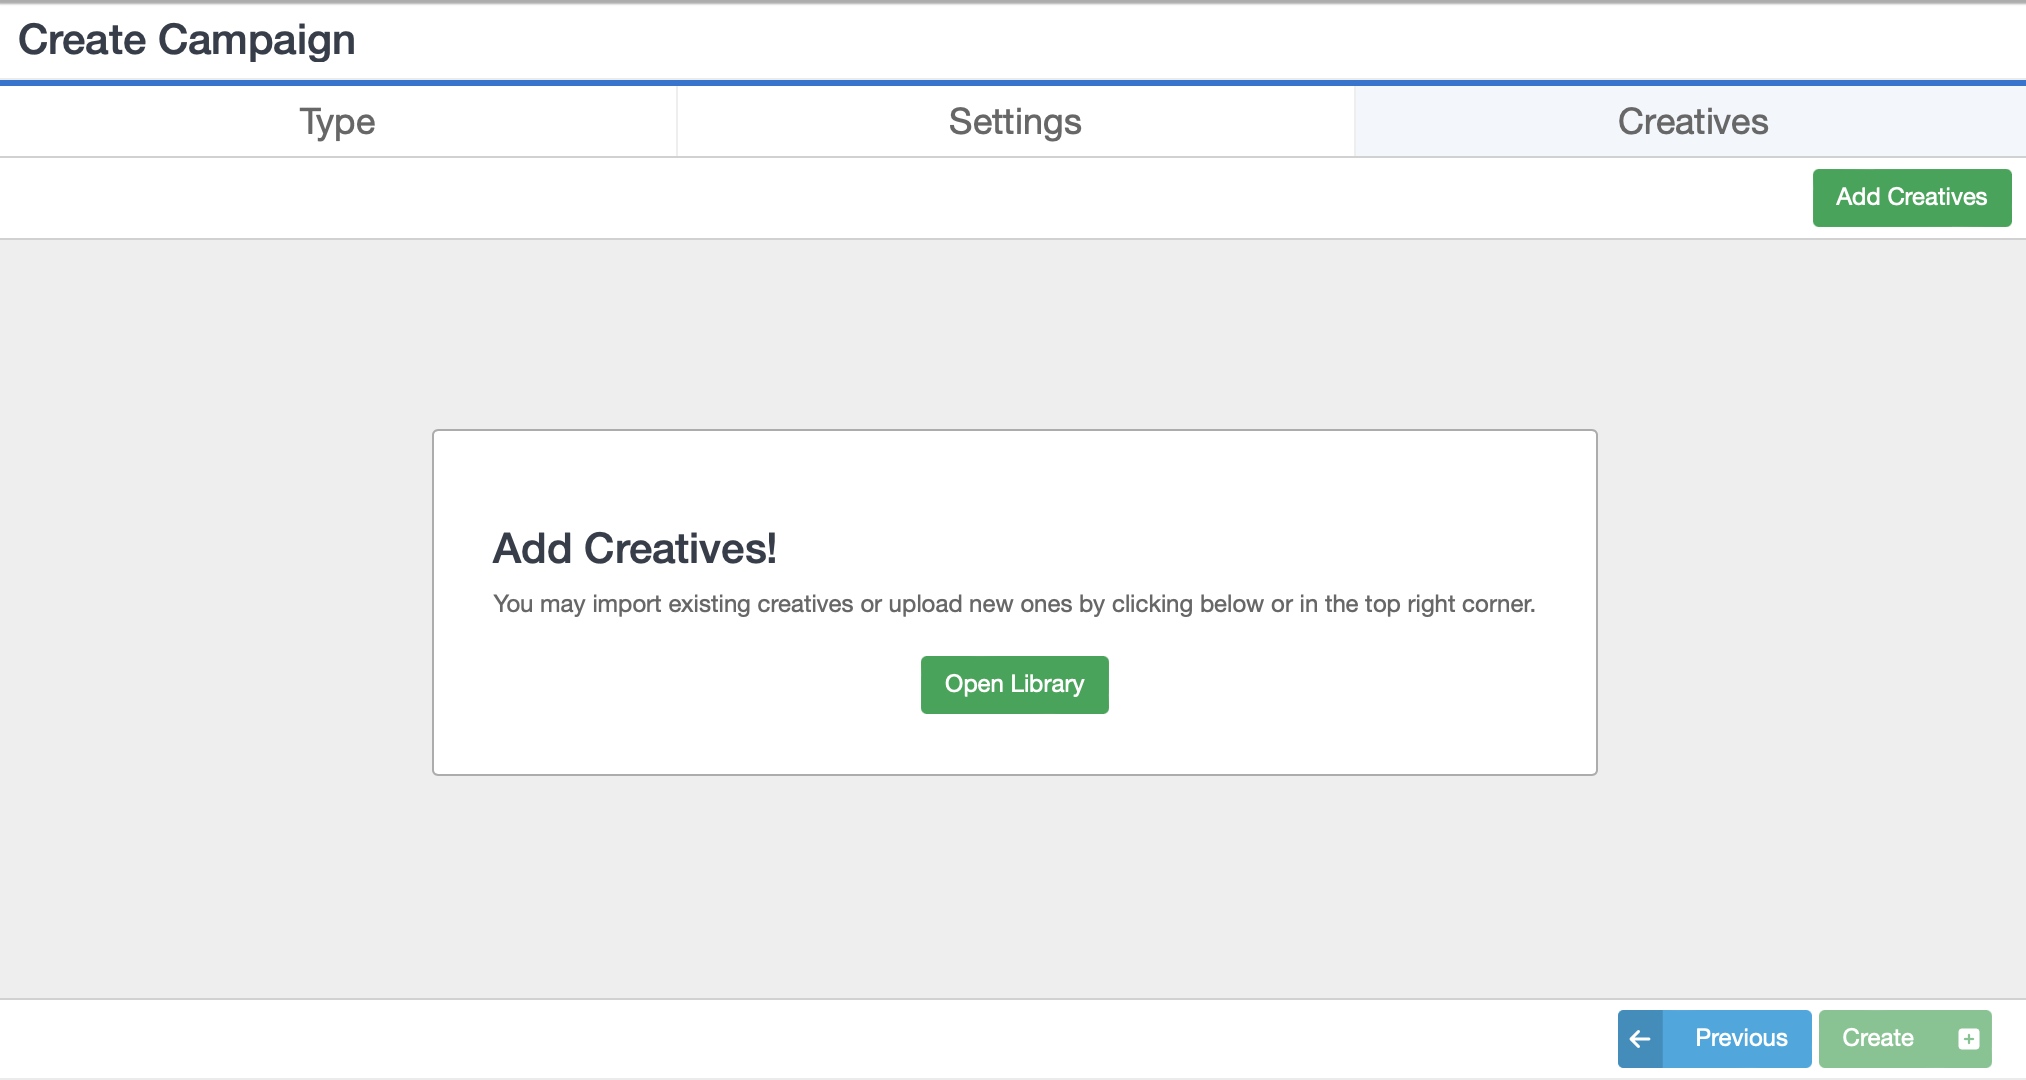
Add Creatives!
Your Creatives Library stores all uploaded Creatives to be easily viewed and implemented in campaigns. You must import Creatives to your Campaign from your Library.
• Select either “Open Library” or “Add Creatives” to access your Creatives Library.
Open Creatives Library
Either select “Open Library” or “Add Creatives”.
• If you have previously uploaded Creatives that are compatible ad types to this campaign, they will be displayed here.
• You may utilize the Filters at the left to sort/search available Creatives.
Adjust the layout by selecting the Grid or List view options in the top right, next to the “Upload” button.
Filters:
Type of Creative
Approval status of the Creative - evaluation of your Creative
Status of the Parent/Account Creative - set by you
Upload a new Creative
Select the green “Upload” button in the top right-hand corner of your Creatives Library window.
Select the kind of Creative(s) you are going to upload.
Video file assets should be a compatible ad size and meet upload restrictions.
Upload restrictions are displayed in the next step.
VAST (Video Ad Serving Template) tag script.
Select the blue “Next” button.
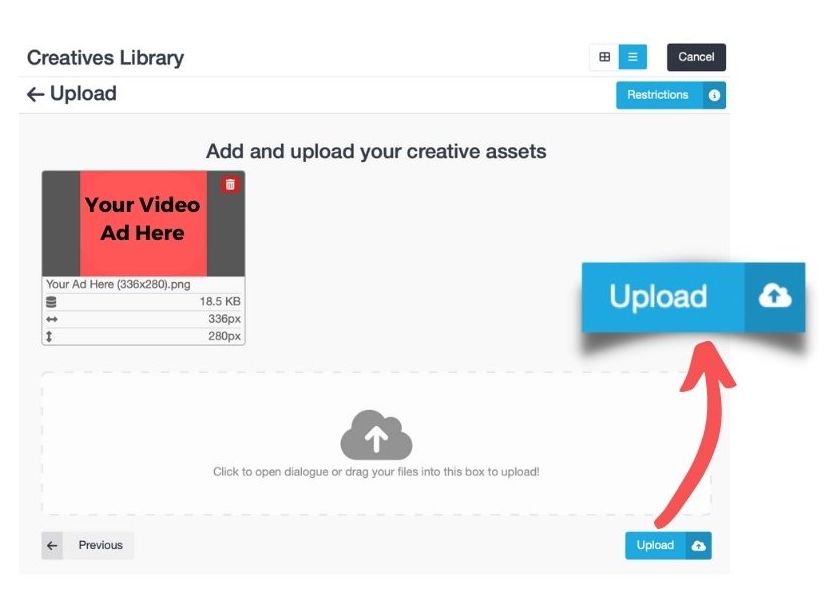
Review upload restrictions by selecting the blue “Restrictions” button at the top right.
Click within the box to select your file(s) OR drag and drop file(s) into the box to upload.
Upload files to your Creative Library by clicking the blue “Upload” button at the bottom right.
If you receive an Upload Error, click the red alert symbol to view details.
Import Creatives to your Ad Campaign
Import Creatives
From the Creatives Library window, select the creative(s) you wish to import to this campaign.
• Selected creative(s) will be highlighted in blue.
Then select “Import” from the bottom menu.

A newly submitted creative may display a “Pending Approval” status until evaluated.
Lander & Weight
Next, designate a Lander and determine the Weight of each creative in your campaign. These are found directly underneath the Creative.
Search for a Lander’s ID# if it was previously used or select “Create New” and type in the URL.
• Weight is how often a creative will be in rotation for that ad campaign.
A Creative’s Weight defaults to “1”, which will route equal amounts of traffic to each Creative.
Finally, create your ad campaign by selecting the green “Create” button in the bottom right.
Your video ad campaign has been created!